My friend Jonas and I simultaneously reached a point in our lives where we came to a sudden and shocking realization. We had a friend, named Bob, who was about to get married. We were both really happy for Bob, but this whole wedding thing involved a lot of planning and thinking and somehow, a $10 t-shirt from Target which read “Game Over” just wasn’t going to cut it for a wedding gift.
We were in a bind, it was still August and the wedding was in December, but we needed to come up with something fast. I was going to school in Minnesota and Jonas was going to school in Wisconsin so work time would be limited to the last few weeks of summer break, Thanksgiving break, and maybe a day or two before the wedding.
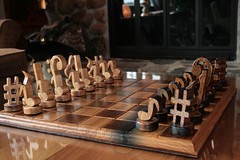
We finally settled on building something, and quickly developed the concept of a musical chess set. Bob and his bride (Laura) are both into music and we figured this would be pretty close to perfect for them. Now all we had to do was build it.
We started off with some Google searches for notes and staffs, finding some we liked, we modified them to the correct size and printed them off for templates.
The wood we had to use was a bunch of butternut that my dad and I had cut down and planned into boards a few years back. We carefully traced out the initial pieces on our boards, which were about a quarter inch thick and began to cut.
Crafting the Pieces
We were cutting the pieces using my dad’s scroll saw. Sadly, the scroll saw was on it’s last legs and required a bit of encouragement to keep it running. Very shortly it reached a point where it wasn’t going to cut at all unless we attached a hand crank to the motor and moved it up and down on our own.
This was a slight setback, because we had only cut a few pieces and this was not something we could do by hand. Fortunately, my dad was ready to buy a new scroll saw and a day or so later we had a new one at our disposal. We quickly started up our cutting work only to cut a few pieces and discover that this saw was also broken.
So far the project wasn’t looking so great. We had been through 2 saws and we had hardly started.
A day or two later we had another new saw at our command and this one was not going to break on us. With it we were able to cut out the rest of our pieces.
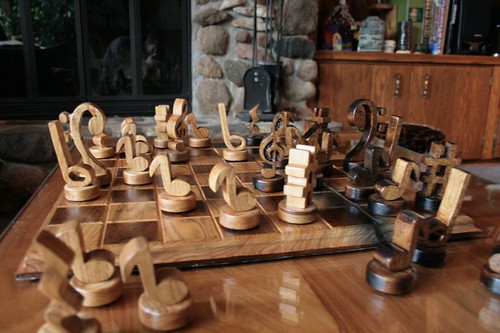
The lineup for the pieces was as such:
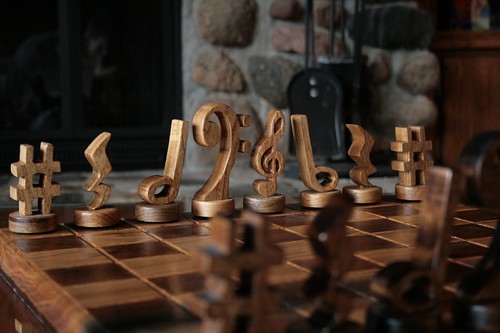
Pawn: Eight Note, Rook : Sharp, Knight: Quarter Rest, Bishop: Half Note, Queen: Treble Cleft, King: Bass Cleft
At this point we had all the pieces cut out so they all created nice 3D block style musical notation. The only thing left was to cut the bases, which was done on a drill press in half inch butternut wood.
Each piece got stained appropriately and the pieces were fastened to the base via a dowel in the middle. Not every piece ended up with the exact same tilt, but overall it was pretty close. Besides, it was a homemade gift and there’s never going to be anything like it again. (Well… maybe…)
Jonas and I were pretty good a being paranoid so throughout the piece building phase we had every single scenario worked out for our chess set. We were prepared to find Bob selling this on ebay a few days later, we were prepared to hear that Laura had horrific childhood memories involving chess, we were even prepared for other wedding guests to give him the same thing. Although none of these events actually occurred, and all were extremely unlikely, it sure helped to pass the time while we worked.
The Board
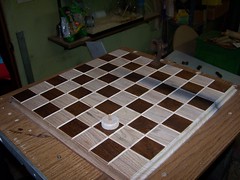
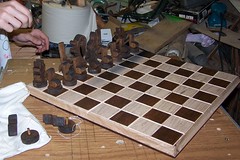
The Board was tough, because our planner is only 13 inches, we had to do the board in two sections. This worked pretty well and we simply glued the two half together carefully and we were good to go.
To separate the squares on the board it was decided that we would router a small trough between them. With the help of my dad, who is much more knowledgeable in this area, we were able to achieve this relatively easily. The big thing my dad did to help us was just get it started. Both Jonas and I were deathly afraid of ruining this amazing thing we were trying to create and the big push we needed was to just start working.
Final Stages
Once we had everything made we could stain it. The butternut was nice and light so we chose a nice dark stain and made half the pieces and half the board quite a bit darker.
By now we are talking Thanksgiving break time. I had managed to get home a few weekends to work here and there, but come Thanksgiving we had the majority of the work done, unfortunately we didn’t have a box yet.
My father, aware of our deadline began crafting a box for us out of some black cherry we had recently acquired. Thanks to his help a few days before the wedding everything was done.
The final few touches included lining the inside of the box with felt to keep the pieces snug inside and also felting the bottom of all the pieces themselves. We had some double-backed adhesive which we attached to the felt and die-cut out circles which could then be stuck nicely to the bottom of each piece.
The only thing left after this was a small set of instructions which were written up and printed off. We then soaked the paper in coffee for a set amount of time to age it and burned off the edges for an authentic look and feel.
I believe this was actually the day of the wedding. In fact, when I stopped at a gas station to pick up a lighter to burn the page edges I ran into Bob there who was, I guess, getting gas.
Finally though, we had finished.
Overall the project was tons of fun. I hold this chess set as one of the coolest things I have ever built.